Here’s how to estimate this useful measurement for free. It’s one of the key Cycling Aerodynamics metrics you need to know to calculate power output and it can also help you figure out your most aerodynamic riding positions.
You only need a camera, the one on your mobile phone will do. You also need a copy of the free image editing software, Gimp . Gimp is available for Windows, Linux and Mac.
Take a picture of yourself on your bike in the position you want to analyse.
A uniform background such as a painted wall behind you will make the next step easier.
Create a new image in Gimp (File > New) make sure to click advanced options and set “Fill With” Transparency.
![]()
Open the picture you took using (File > Open as Layers)
Remove the Background from the Image
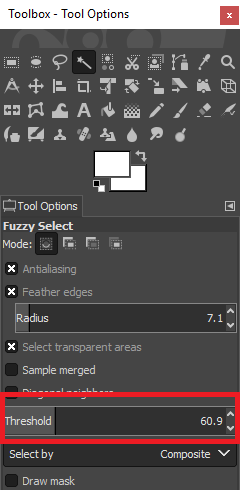
Now use the fuzzy select tool (Indicated with Arrow in the image below) to select the background. (You’ll see a shimmering dotted lie around your image).
You can change how the fuzzy select tool finds the outline by changing the threshold. You don’t want any of the dotted line within the image
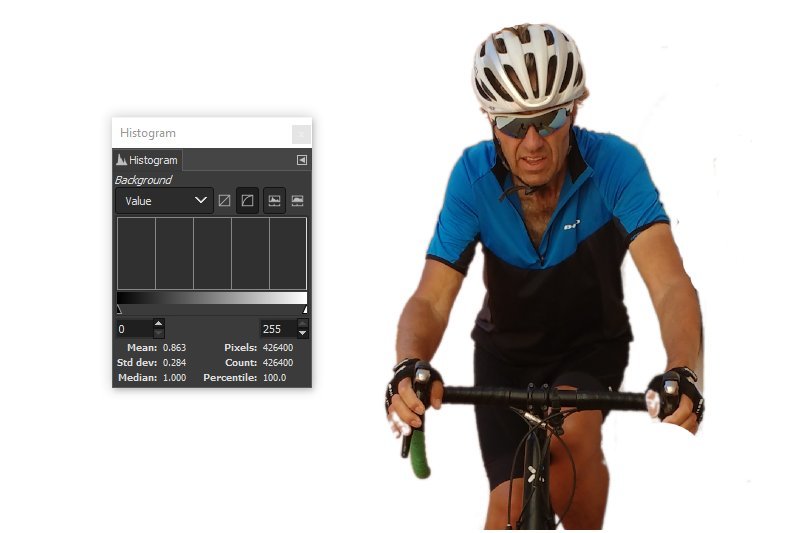
When you are happy with your selection hit delete and you should see your image against a transparent background (indicted by small Dark Grey/Light Grey squares)
Note your image will not look like this one (below), I have added the before or after in the same image.

Count the Number of Pixels in the Image
Now go to Color > Info > Histogram and you will see the number of pixels in the image.
![]()
So you now know your frontal area in pixels.
Now work out what the area of each pixel is
To do this we find a dimension on the image that we can measure. Ideally you would have put a ruler in front of the bike but I didn’t so let’s use the front tire instead for this example.
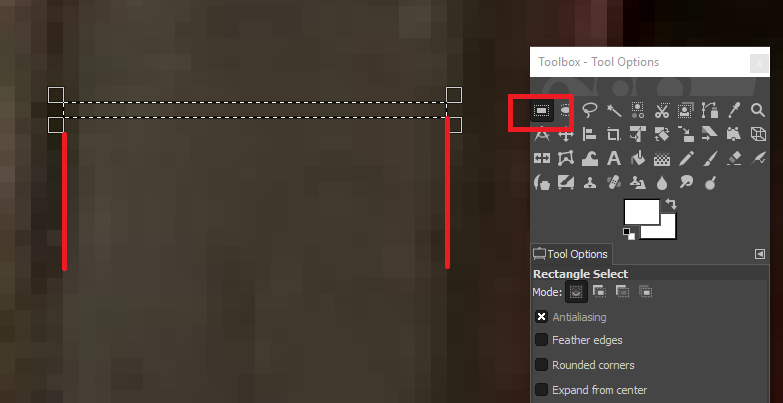
Zoom in on the front tire so you can see the individual pixels View > Zoom (1600%)
Using the select tool (in red square) grab one row of pixels the exact width of the tire and select copy (Ctrl C).
Create a new image with a transparent background and paste this image. Use the histogram to find the number of pixels you have grabbed in the same way you did previously. (You could also count them just to be sure).
Go to the bike and on the physical tire measure the width of the area where you grabbed in the image. (Now you know why a ruler would have been handy).
Divide the width of the tire by the number of pixels and you have the width of a pixel, square this and you have the area of a pixel.
Now multiply this by the total number of pixels in the image of you on your bike and you know know your frontal area for this position.
Repeat for all other positions you want to try or until you get bored.
You now have the data you need to optimize your cycling aerodynamics.
Notes for getting the best cycling aerodynamics data
- All values should be in Metres Squared (M2).
- To sense check the results your value should be around:
- Tops: 632
- Hoods: 40
- Drops: 32
- This is really hard to do if you are actually riding the bike!! I lean against a pillar that is the same colour as the wall behind me.
- Use a ruler rather than a tire as a reference.
- This is an OK method for what we want to do but it’s not super accurate. Universities put huge resources into this kind of thing using 3D measuring techniques.

